The Ultrasound extension for 3D Slicer contains modules to process ultrasound video data. Suggestions and contributions are welcome!
This module reads a folder of ultrasound cine loops in DICOM format and iterates through them. It allows masking the fan shaped or rectangular image area to erase non-ultrasound information from the images. It also allows associating labels to loops, so classification annotations can start during anonymization. The masked loops are exported in DICOM format. The exported DICOM files only contain a specific set of DICOM tags that do not contain any personal information about the patient.
- Select Input folder as the folder that contains all your DICOM files. They can be in subfolders.
- Select Output folder as an empty folder, or which contains previously exported files using this module.
- Click Read DICOM folder and wait until the input and output folders are scanned to compile a list of files to be anonymized.
- Click Load next to load the next DICOM file in alphabetical order.
- Click Define mask and click on the four corners of the ultrasound area. Corner points can be modified later by dragging.
- Click Export to produce three files in the output folder: the anonymized DICOM, an annotation file with the corner points, and a json file with all the original DICOM tags that went through light anonymization.
Options under Settings collapsible button:
- Skip single-frame input files: use this for efficiency if you only need to export multi-frame DICOM files.
- Skip input if output already exists: prevents repeated loading of files whose output already exists.
- Keep input folders and filenames in output folder: keeps the subfolder structure and file names of input files.
- Convert color to grayscale: use this if you want to eliminate colors in the exported images.
- JPEG compression in DICOM: use this to apply compression in exported files without visual information loss.
- Labels file: Select a CSV file that contains classification labels. These labels will populate the GUI with checkboxes. Checked labels will be saved in the exported annotation json files.
This module generates an M-mode image from a B-mode loop along a user-specified line (see US types). The line can be arbitrary, not just ultrasound scan lines. Measurements on the M-mode image can be saved.
- Select Output folder where exported files will be saved.
- Click Scanline to add a line markup on the B-mode image.
- Click Generate M-mode image to generate the M-mode ultrasound in the lower view.
- Optionally click Measurement line to add a ruler on the M-mode image.
- Click Save M-mode image to export both the current B-mode image and the M-mode image with their lines. And the measurement in a CSV file in the output folder.
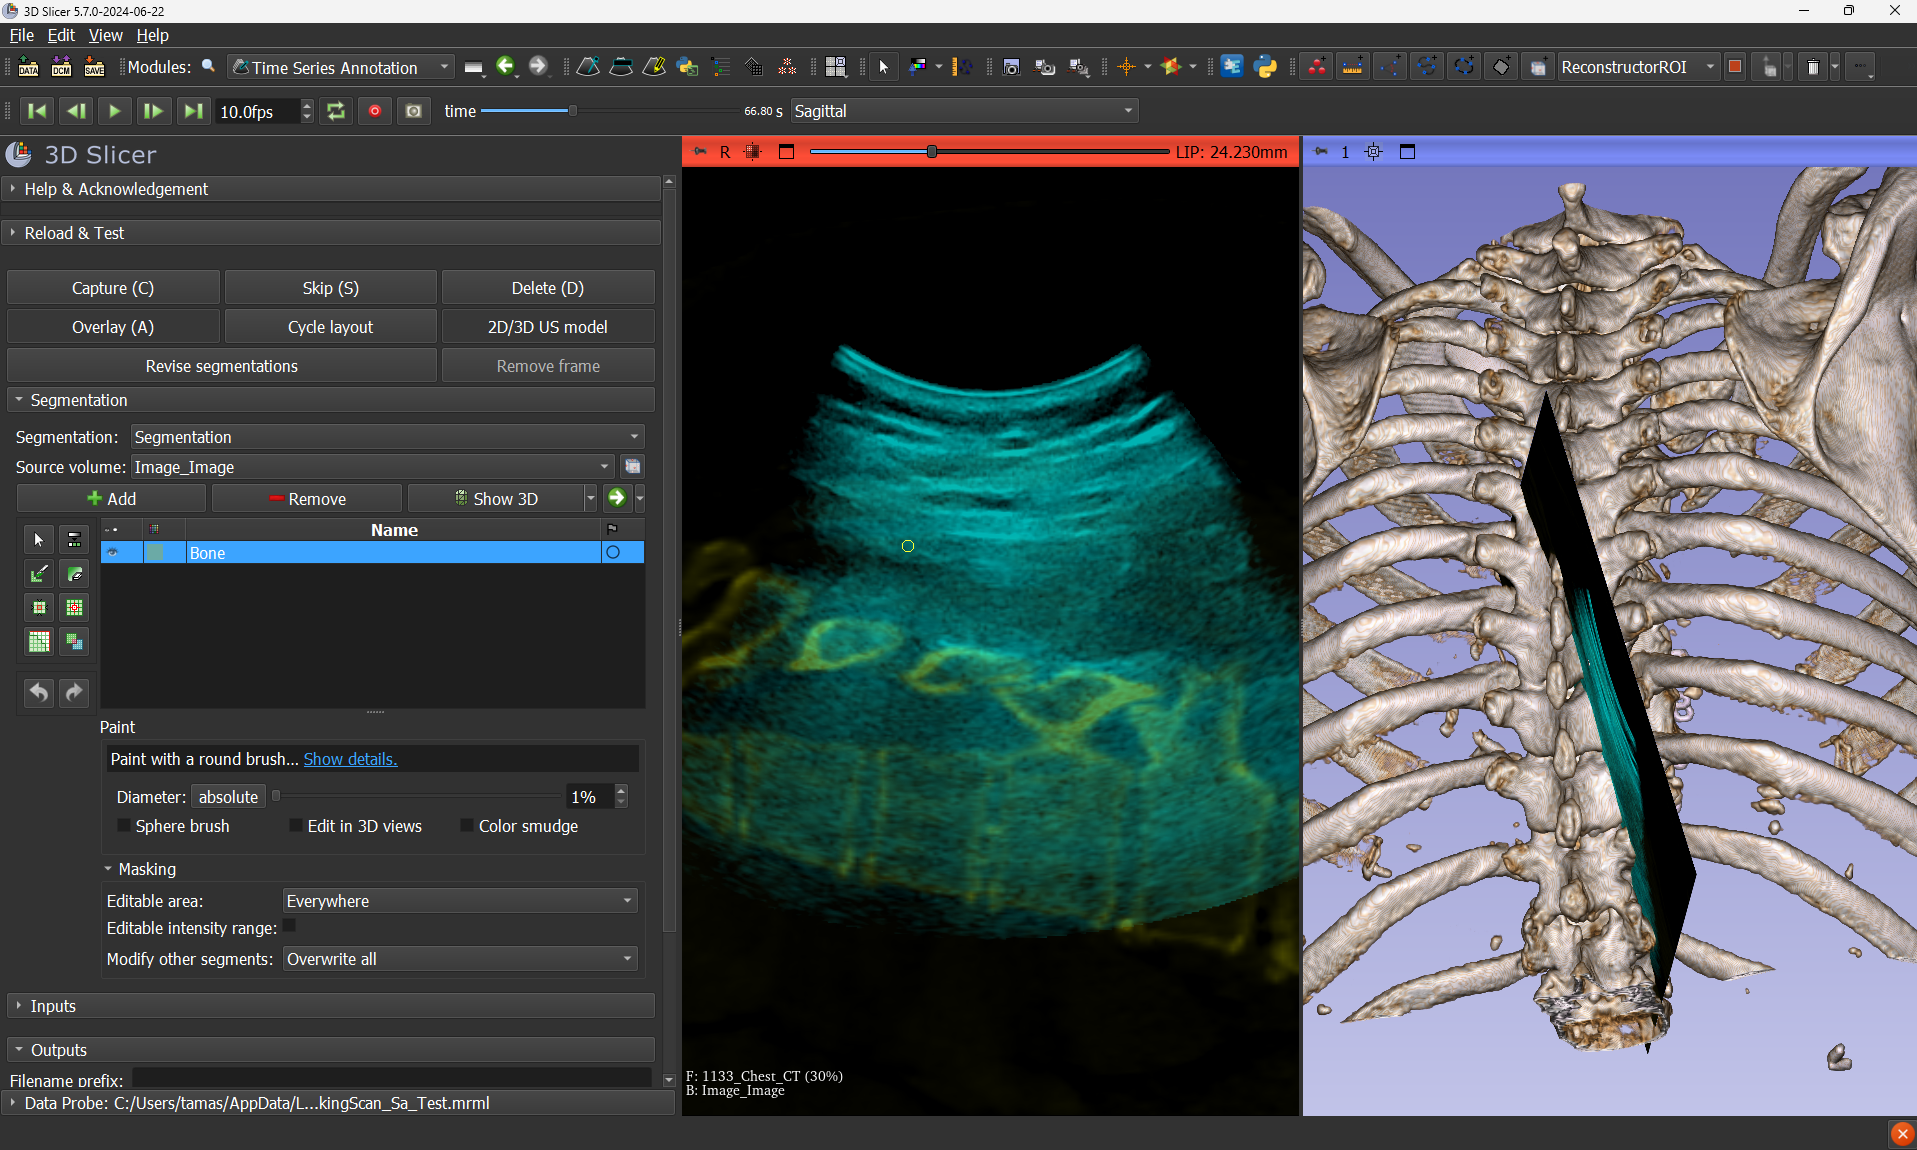
This module facilitates the process of creating segmentations for time-series 2D images (ultrasound) and saving segmentations into an output sequence browser.
- Prepare a Slicer scene with a recorded sequence browser with image frames and optionally tracking (transform) data, registered CT or MRI, ultrasound beam surface model, etc. Althernatively, use the 'Load sample data' button.
- Make selection in the module's Inputs section.
- Use the Segmentation section to create segmentations for frames.
- Keyboard shortcuts facilitate the workflow: C saves current frame, S skips current frame without saving, D erases current segmentation, A shows/hides foreground volume.


