Setup
The tutorials are actively developed under Ubuntu 15.10, therefore it is recommended to follow them under this operating system.
##Ubuntu system - easy installation The tutorials require the following packages:
- OpenCASCADE community edition.
- FreeCAD
- CMAKE
- GIT - you know what this is :)
I am going to use Eclipse as development environment with the EGit plugin, but you are free to follow the tutorials in any IDE of your choice.
In your Ubuntu, open up a terminal window and first install OpenCASCADE community edition:
sudo apt-get install liboce-*
Then, you can install FreeCAD:
sudo apt-get install freecad
And CMAKE:
sudo apt-get install cmake-qt-gui
If you decide to use Eclipse for development, you can install it by:
sudo apt-get install eclipse-cdt
After Installing Eclipse, you might want to install the eGIT plugin, so that you can clone the OccTutorial repository. To do so, start Eclipse and go to Help->Install new software... In the window that opens, press Add... (next to Work with...) to add the eGIT repository. Give the name eGIT for example and the following URL:
http://download.eclipse.org/egit/updates

After adding the eGIT repo, select Eclipse Git Team Provider, click Next... and install the team provider plugin. You might have to restart Eclipse after the installation is done.
##Cloning the Git repository in Eclipse After Eclipse is restarted, you can open up the Git perspective in Window->Open perspective...->Other->GIT. In the GIT perspective, choose Clone existing repository and insert the following URI:
https://github.com/lvk88/OccTutorial.git
Click next. In the next tab, it is enough if you only select the branch "Master" for checking out. Proceed to the next tab, (select the directory where you want to check out the code), and click finish. After the repository is cloned, start CMAKE, by simply typing
cmake-gui
In a terminal window. Select the directoy where the repository is checked out in Where is the source code. Then select, another directory where you would like te build files to be written. I prefer to have an out-of source build, so I usually have the following:
Sources:  /home/laszlo/workspace/OccTutorial
Build:    /home/laszlo/workspace/OccTutorial_build
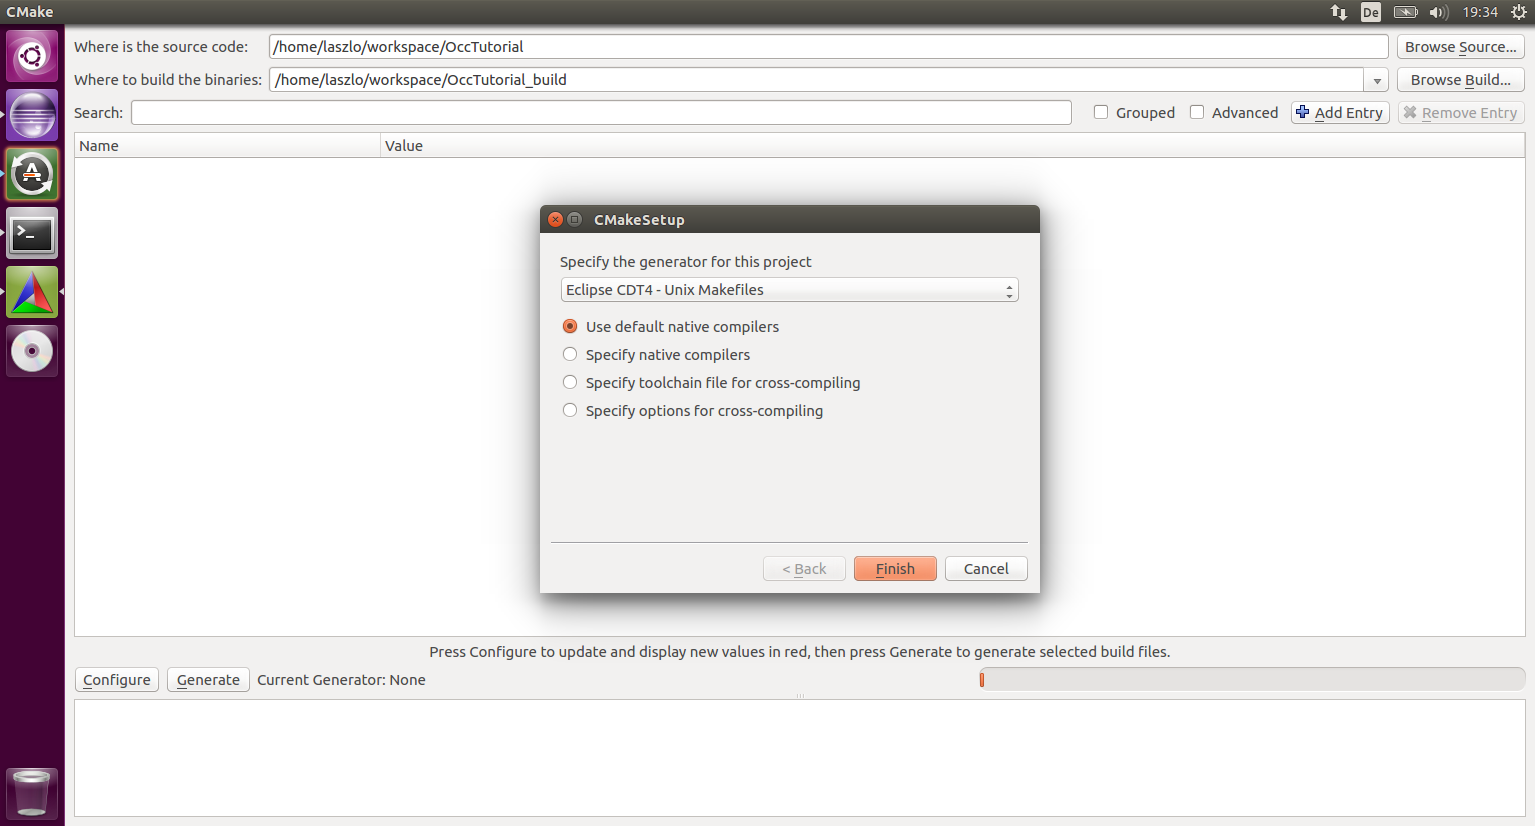 Click configure, select Eclipse CDT as the IDE environment, then OK. After this, you can set the build type to your choice:
DEBUG
RELEASE
RELWITHDEBINFO
I usually use RELWITHDEBINFO. After this is set, click Generate and you can exit CMAKE.

##Adding the CMAKE-generated project in Eclipse In Eclipse, go to File->Import->Existing project into workspace. In the window, select the build directory (e.g. in my case /home/laszlo/OccTutorial_build) and click Finish. The project is now imported in Eclipse, and you can start working. On the right side of the screen, in the Make target tab, you can click the target all, which will build all the tutorial executables.
To run one of the executables, you can either open up a command line and run from there, or in the Project explorer (left side of the screen) open up the "Binaries" subsection in the tree, and right click one of the executables, then choose Run as->Local C/C++ application. For example, to run Chapter 0:
 If you run Chapter 0, in the Console tab (bottom part of the screen), you will see some output, something like this:
------- OpenCASCADE Tutorial by Laszlo Kudela -------
------- Chapter 0: Demonstrative example      -------

*******************************************************************
******        Statistics on Transfer (Write)                 ******

*******************************************************************
******        Transfer Mode = 0  I.E.  As Is       ******
******        Transferring Shape, ShapeType = 0                      ******
** WorkSession : Sending all data
 Step File Name : boxWithHole.stp(434 ents)  Write  Done
Created box with hole, file is written to boxWithHole.stp
Volume of the model is: 401825.22957532
Center of mass is: 1.3218306535823e-15 1.7691071874277e-16 25
Matrix of inertia:
485040448.28267-4.4244453128079e-09-7.6761352829635e-09
-4.4244453128079e-09485040448.28267-5.3077981699738e-09
-7.6761352829635e-09-5.3077981699738e-09802653717.57562
As the text suggests, a simple box shape with a hole inside was built by the program, and a STEP file output was produced. To have a look on it, you can launch FreeCAD, and open up the file. The file is located in:
[path_to_your_build]/bin/boxWithHole.stp
Well done, you are all set to follow the tutorials of OpenCASCADE!