-
Notifications
You must be signed in to change notification settings - Fork 229
How to install TerosHDL on Windows and Linux
- Installation on Windows
- Installation on Linux
- Installation continues for both systems
- Configuration
- Ver2 Create a new project and simulate it
- Ver2 Implement design using Vivado
- Schematic viewer on Linux
Note: The official install instructions for new version 5 are available on TerosHDL web pages.
-
Download and install Python.
-
Start Command Prompt Start > cmd and use the Python package manager to install all required TerosHDL packages.
# Manually
pip3 install vunit-hdl
pip3 install edalize
pip3 install yowasp-yosys
pip3 install vsg

# Or all together
pip3 install teroshdl
pip3 install cocotb
-
Download and install make for Windows (
make-3.81.exe) toC:\APPZ\VHDL(NEVER use accented symbols and spaces in the path to program). Add folderC:\APPZ\VHDL\GnuWin32\binto System variablePATHin Environment Variables... and restart the computer.Hint: In Windows 10 start
Settingsapplication, selectSystem,About,Advanced system settings, and click on buttonEnvironment Variables...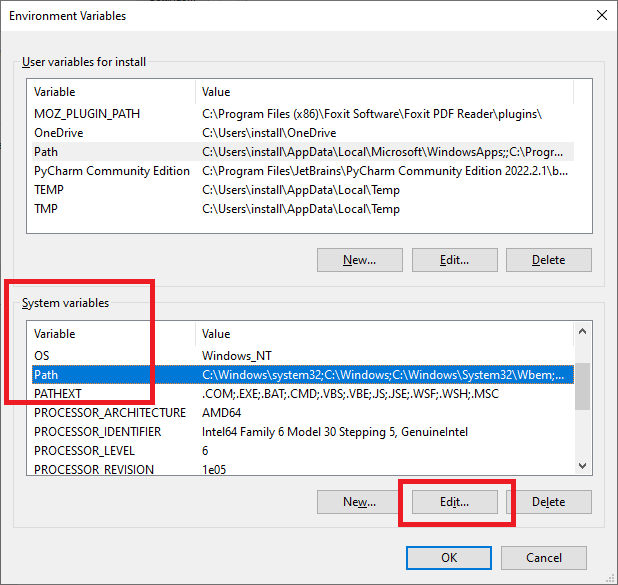
-
Download and unzip ghdl for Windows (
ghdl-0.37-mingw32-mcode.zip) toC:\APPZ\VHDL. -
Download and unzip gtkwave for Windows (
gtkwave-3.3.100-bin-win32.zip) toC:\APPZ\VHDL.
-
Download and install Python.
-
Start Terminal (typically
Ctrl+Alt+T) and install all required packages.# Download and install TerosHDL required packages pip3 install teroshdl # Optional pip3 install cocotb # Download and install required tools sudo apt-get install make ghdl gtkwave
-
Download and install Visual Studio Code source code editor.
-
Run Visual Studio Code, open up the extensions viewer in menu View > Extensions Ctrl+Shift+X, and then typing
terosinto the search bar. Press Install button on the resultTerosHDL.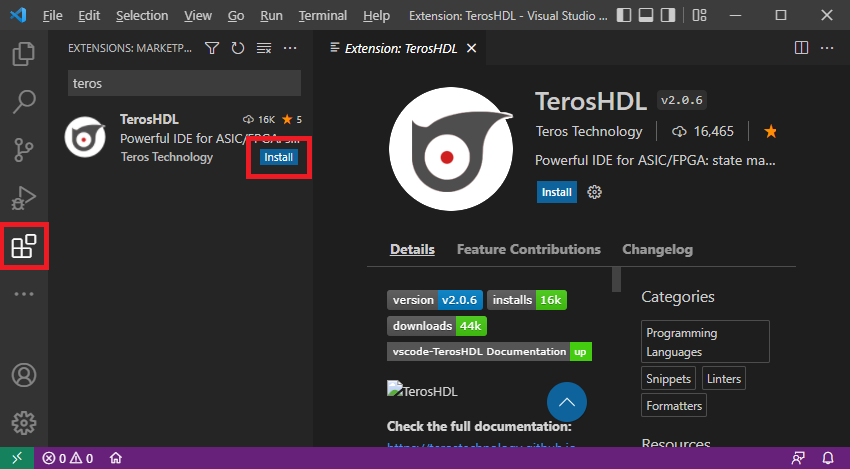
It may take a few minutes depending on your connection speed. Do not close any window and do not open other folders until the installing process is completed.
-
Optional: Install
WaveTraceVisual Studio Code plugin as well. It will be useful to display simulated*.vcdfiles.
Click on the TerosHDL icon in the left-hand margin, then on TerosHDL configuration gear at TEROSHDL: PROJECT MANAGER, and set/check the following:
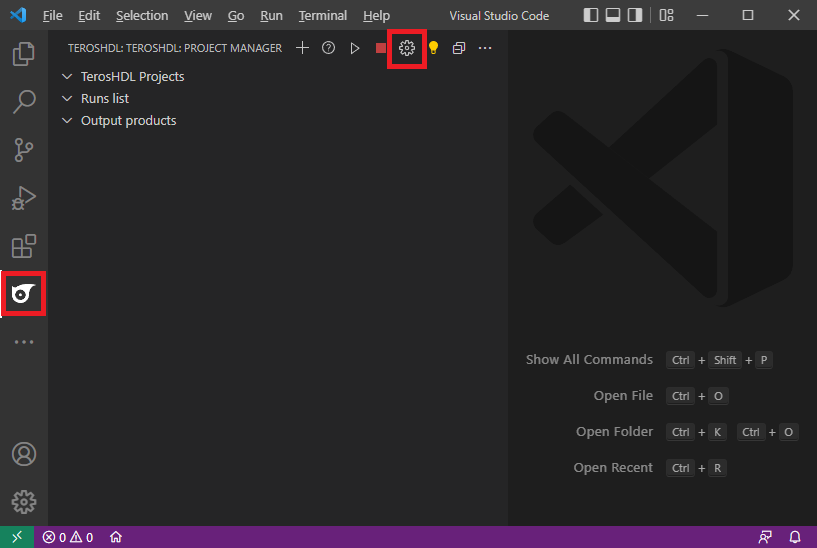
- General > Enable show TerosHDL console: check
-
General > Select a tool, framework, simulator...:
Ghdl -
General > Select the waveform viewer:
VCDrom -
GHDL > Installation path:
C:\APPZ\VHDL\GHDL\0.37-mingw32-mcode\binon Windows or/usr/bin/on Linux -
GHDL > analyze options:
--ieee=standard,--std=02 -
Linters settings > VHDL style checker:
VSG -
Formatter settings > VHDL formatter:
VSG - Formatter settings > VHDL standalone formatter > Indentation: "2 spaces"
- Click on button Apply and close
Click on the TerosHDL icon in the left-hand margin, then on Open Configuration Menu button in Actions part, and set/check the following:
-
Formatter > General > VHDL formatter:
VSG -
Linters settings > General > VHDL style checker:
VSG -
Tools > General > Select a tool, framework, simulator...:
GHDL -
Tools > General > GTKWave installation directory:
C:\APPZ\VHDL\gtkwave\binon Windows or/usr/bin/on Linux -
Tools > General > Select the execution mode:
GUI -
Tools > General > Select the waveform viewer:
Tool GUI -
Tools > GHDL > Installation path:
C:\APPZ\VHDL\0.37-mingw32-mcode\binon Windows or/usr/bin/on Linux -
Tools > GHDL > analyze options:
--ieee=standard,--std=02 - Click on button Apply and close
-
Click on
plussymbol on TerosHDL Projects > Empty project and set the project name, such ascomparator.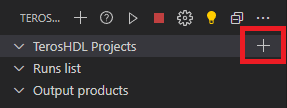
-
Create or copy source VHDL files (design.vhd and testbench.vhd) to any project folder on the disk. Do NOT use accented symbols and spaces in the path to project folder! Click on
plussymbol on your new project and add existing files to in by Select files from browser.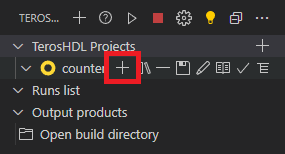
-
If you have multiple projects, select one by Select project check symbol.
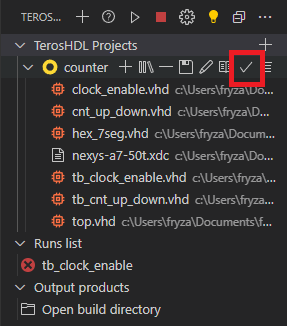
-
Select testbench file to simulate by Set as Top check symbol.
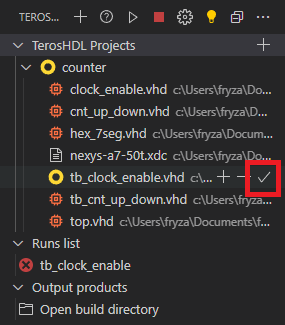
-
Run the simulation by Start button at TEROSHDL: PROJECT MANAGER or by Run in Run list top-level file.
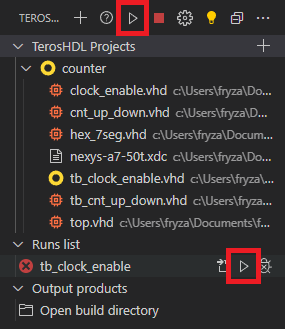
-
To display the simulated waveform, click on Run with GUI button. You can move the waveform by pressing
Shiftkey and scrolling the mouse wheel, or you can zoom it by pressingCtrland scrolling the mouse. Note: Thewaveform.vcdfile is located inyour-home-folder/.teroshdl/build.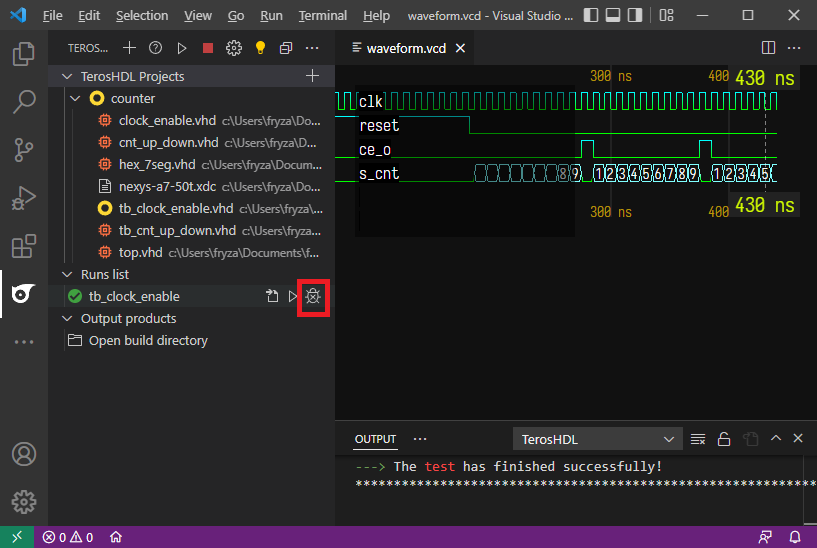
-
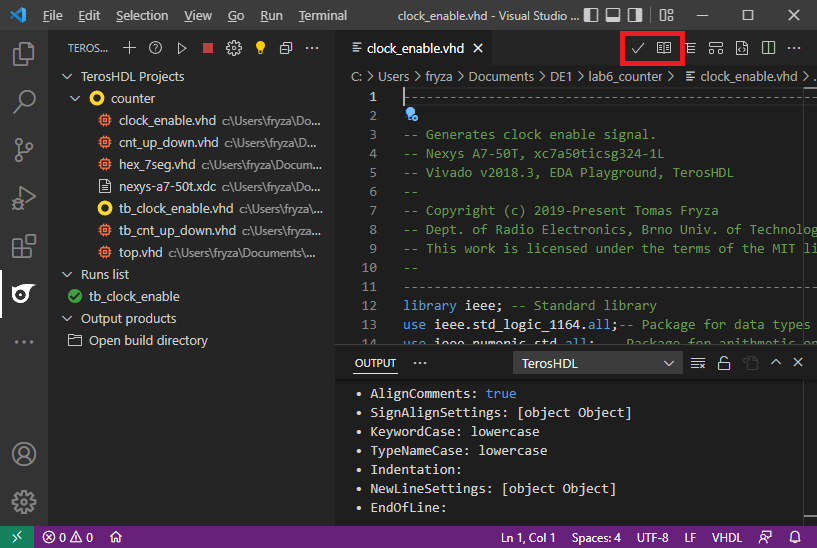
You can apply formatter settings to open VHDL file by Format check symbol in upper margin or you can generate the documentation by Module generation preview symbol.
-
In TerosHDL configuration change the following:
-
General > Select as tool, framework, simulator...:
Vivado -
Vivado > Installation path:
C:\APPZ\Xilinx\Vivado\2020.2\binon Windows or/home/your-home-folder/bin/Xilinx/Vivado/2020.2/binon Linux -
Vivado > Part:
xc7a50ticsg324-1L(it is the device on Nexys A7-50T board, we are using in the course)
-
General > Select as tool, framework, simulator...:
-
Note that in your project, there must be design
*.vhdfile(s) and constrains*.xdcfile, such as nexys-a7-50t.xdc. Do not forget to uncomment the lines corresponding to used pins. -
If you have multiple projects, select the one to implement by Select project check symbol.

-
Select the top level *.vhd file to implement (not the testbench!) by Set as Top check symbol.
-
Connect your FPGA board and run the implementation process by Start button at TEROSHDL: PROJECT MANAGER or by Run in Run list top-level file. Note that the whole process may take several minutes.
-
Get sources and install Yosys.
git clone https://github.com/YosysHQ/yosys
cd yosys
Select your compiler in Makefile.
vim Makefile

# CONFIG := clang
CONFIG := gcc
# CONFIG := afl-gcc
# CONFIG := emcc
# CONFIG := wasi
# CONFIG := mxe
# CONFIG := msys2-32
# CONFIG := msys2-64
Install dependencies.
sudo apt install tcl-dev libreadline-dev
Compile and install.
make
sudo make install
Get the installed version.
yosys -V
-
Get sources, build and install GHDL. Note: GHDL must be built with at least version of 8 GNAT (gnat-8).
git clone https://github.com/ghdl/ghdl
cd ghdl
Install dependencies.
sudo apt install gnat
Configure, compile and install.
./configure
make
sudo make install
Get the installed version.
ghdl --version
-
Get sources and build ghdl-yosys-plugin
git clone https://github.com/ghdl/ghdl-yosys-plugin
cd ghdl-yosys-plugin
Compile and copy generated library
ghdl.soto/usr/share/yosys/pluginsor/usr/locall/share/yosys/pluginsdirectory. Create this folder if necessary.make sudo cp ghdl.so YOUR-YOSYS-FOLDER/plugins/
-
In TerosHDL, Open Configuration Menu:
-
Schematic viewer > General > GHDL:
GHDL (module) + Yosys - To show design using logic primitives rather than RTL, set Schematic viewer > General > Arguments passed to Yosys:
synth
-
Schematic viewer > General > GHDL:
| Version | Result (yyyy-mm-dd) | Note |
|---|---|---|
| Linux Mint 21.1 (Vera) | OK (2024-02-27) | Office |
| Windows 10 | OK (2024-02-06) | HomeOffice |
| Linux Mint 21.1 (Vera) | OK (2023-02-22) | Office |
| Windows 10 | OK (2022-10-17) | Office |
| Windows 10 | OK (2022-09-09) | Lab SC 6.61 |
| Windows 10 | OK (2022-04-12) | Lab SC 6.61 |
| Linux Mint 20.3 (Una) | OK (2022-04-05) | Office |
# FYI: How to check OS version in Linux
$ cat /etc/os-release

# Or by Neofetch
$ neofetch