Devices
This chapter describes creation, editing and searching of devices. The main window contains the search function, the list of available devices (or the search results), the button for exporting the list of results and the Add button for creating new devices.
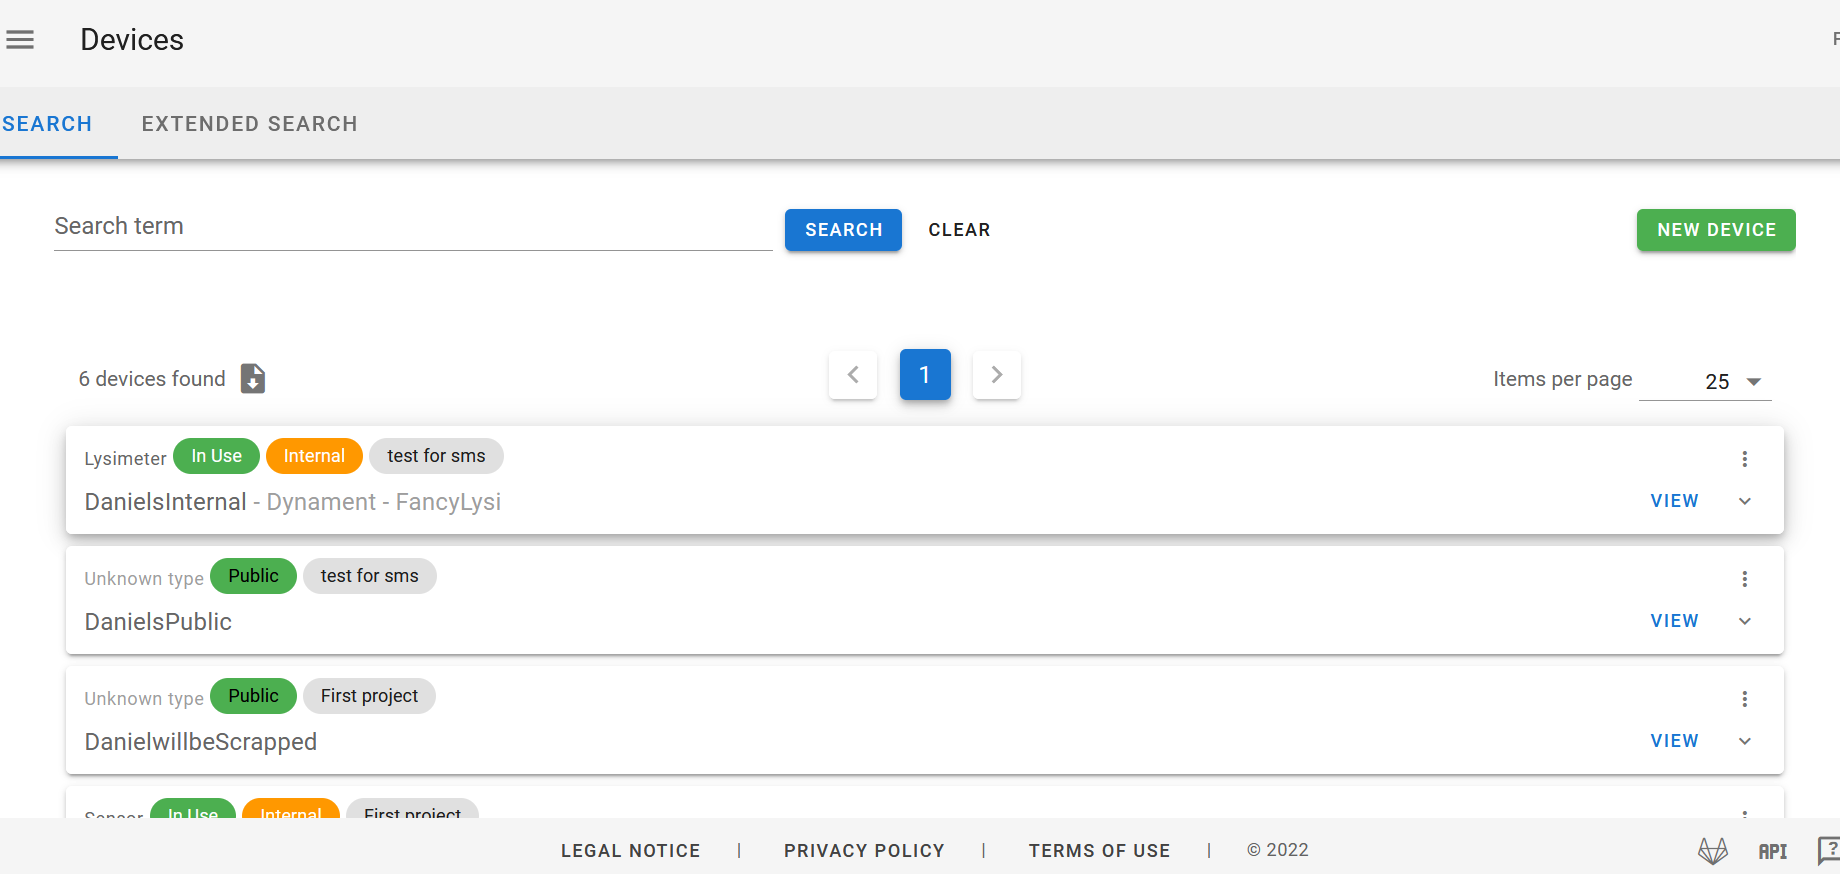
You have the option to search for devices. There is a search field in the upper part for free entry of search terms. Depending if you are logged in or not you see a different subset of all the devices in the system (public for users without login, public & internal for those with login). Private devices are only visible by the creator. The search results are displayed in tabular form in the lower part of the page.
In the Extended Search tab, you have the option for searching for specific attributes of the devices. To do this, you can link search terms including a free text search. You also have the option of displaying only your own devices and archived device via a checkbox.

You can export your (search-)list as a structured csv-file by clicking the small download button next to the number of search results. 
To create a new device use the New Device-button at the top right corner and a new editing window will open. Here you have the opportunity to enter all relevant information about the device. In some fields you can select from defined entries. In this field entries can be searched for by entering search terms directly into the field. Only when the Basic Data page has been correctly filled out and saved the other tabs can be filled.
The basic parameters of the device are recorded in this field. There are fields that are mandatory and fields in which an entry is optional. In some fields, selection is required via a fixed selection list. Saving the entries must be confirmed with Create-button. After successful saving (message "Device created"), the other tabs of the device can be filled out.
- private: This device is visible and editable just for you.
- internal: This device is visible for all users who are logged in. Only members of the assigned groups can edit it.
- public: This device is visible for all users. Only members of the assigned groups can edit it.
UFZ:
Groups and roles are handled using the Data Projects. Projects and access authorizations are managed in the Helmholtz VO. Please contact your IT support at your center to create a new project or be added to an existing project.
GFZ:
The SMS is connected to the HIFIS Virtual Organizations, so you can add groups there. You can also expose groups from the myprofile page using the "External use" checkbox:

You can find it on Groups > Management > (Select a group) > "External use".
Give your device a short name which is clearly describing your device. Avoid serial numbers and manufacturer or model information (these metadata can be filled in other fields).
In this field you can assign a meaningful name to your device.
Here you can select a status for your device that it has when the device is created. Activities on the sensor, e.g. calibrations, maintenance work, destruction are then created via the actions in the life cycle of the device. When creating Configurations, the usage times and locations of the device are also specified. The current status is displayed as a tag in the overview of the sensors.
The device type specifies the general type of the device (e.g. gravimeter or manometer) and can be selected from a list. This allows a summary of device groups to be achieved.
Specification of the manufacturer of the device as a selection list. If you cannot find a suitable entry and want to create a new manufacturer entry, please continue reading the chapter controlled vocabulary curation process.
If you have a manual or technical data sheet at hand it is best practice to insert the name exactly as written there.
The model is a more detailed designation of a device from a specific manufacturer.
Here you have the option of storing additional information about the device. For example, additional information about a self-constructed device or information from the manufacturer can be stored. Please note that concrete attributes for specifying a device are already varied available for selection and use these fields first.
Manufacturer's website for the device. Please check the link before entering.
The unique serial number of a specific device of a manufacturer/model.
The unique inventory number of a specific device of a manufacturer/model. Mostly used for internal purposes.
Dual-use describes the basic usability of technologies or goods for both civilian and military purposes.
Information about the entity including the full name and email of the owner is stored at a PID-service outside the SMS. After creation of a persistent identifier (PID) the handle is displayed in the field PID in Device Basic Data.
Contact persons (from the contact list) who can be assigned to the device can be created here. Roles can be assigned to these people. The selection is made from a list.
In this tab you have the possibility to define measured variables of the device. These mostly physical parameters can be added in any number by Add measured quantity. Adding a new measured quantity then requires entering relevant attributes. All created parameters are displayed in a table. With a click on a field further information is displayed.
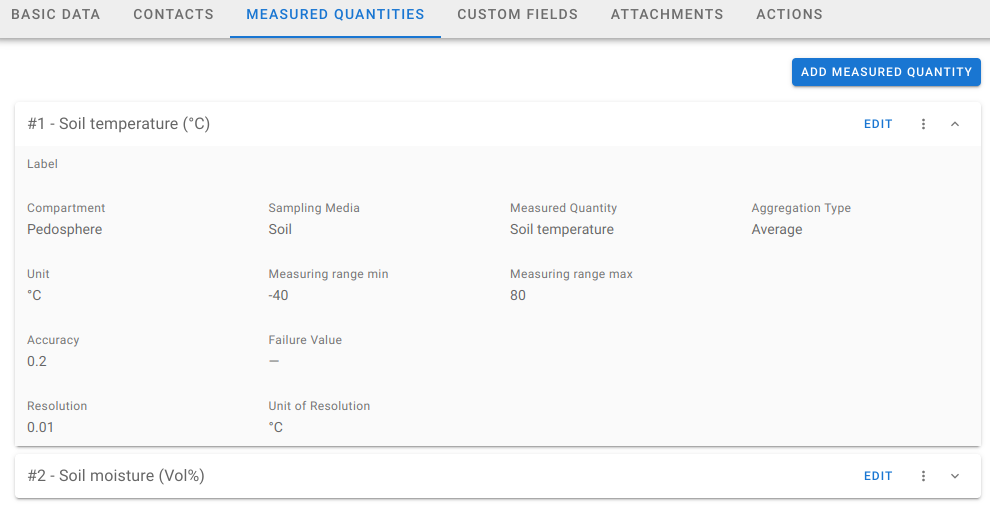
A free label for the parameter can be assigned here to specify it in more detail. If, for example, the same parameter is measured several times by a sensor, it can be numbered here.
Selection of a thematic compartment.
Selection of a sampling media. If a compartment was previously selected, only the collecting media that belong there will be displayed.
The actual measured variable/property is selected here.
Here you can select if the measurement is done with an average, maximum, minimum, cumulated sum or more. Based on your selection of the measured quantity a default value will be selected.
Here you can define a unit for selected measured quantity.
Here you can define a measuring range for selected measured quantity. The specification is made with minimum- and maximum values.
Here you can define a accuracy for selected measured quantity (e.g. from datasheet).
Here you can define a failure value for selected measured quantity (e.g. from datasheet).
Here you can define a resolution with associated unit for selected measured quantity (e.g. from datasheet).
Here you can define various settings of your instrument that can be user defined or that may change over time.
With the "Add Parameter" button you can create new entries.
- Label
- Unit (optional)
- Description
You can add the values for the parameters directly with press button 'Add and Set Value' or in the actions tab with a new "Parameter Value Change" action.
After you added values, you can expand the panels for the parameters to see an overview over the changes and their associated dates.
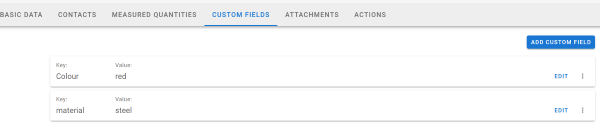
Custom fields gives you the opportunity to define your own metadata that cannot be found in the basic data or the measured quantities and is specifically required for a device. You can define a name (key) and a value here by entering free text.
Here you have the possibility to upload related files/links (manuals, calibration certificates, pictures, etc.) to your device.
If you select an image as an attachment, you can decide directly by selecting the checkbox 'Show the attachment as an image on the Basic Data tab' that the image is displayed as a preview in the Basic tab.
Actions allows you to create events that belong to the device. Under the Create Action button you can select an action type.
After an (device) action has been successfully created, it is displayed in the timeline of the action tab. All events of a device can be traced chronologically here. When you click on an action, the entry opens and further information are displayed.
The following actions are currently implemented:
Regular adjustment of a device to ensure it provides accurate and reliable measurements.
If the device has been calibrated (internally or externally), an action can be created for it. The time (or - range) is recorded together with information on responsible persons, descriptions, documents and possible calibration formulas. It is possible to specify the specific measure that has been calibrated. To do this, it must have been created in the measured quantities.
Checking a device to confirm it meets required specifications or operational standards.
If the device has been verified (internally or externally), an action can be created for it. The time (or - range) is recorded together with information on responsible persons, descriptions, documents and possible verification formulas.
Routine activities performed to keep a device in optimal working condition.
If maintenance has been made on the device, this can be recorded with this action. The timestamp of the maintenance and a description are recorded. In addition, documents can be attached.
Monitoring the performance or condition of a device to identify potential issues.
If an observation has been made on the device, this can be recorded with this action. The timestamp of the observation and a description are recorded. In addition, documents can be attached.
If you have rented your device to someone or borrowed it for a longer period of time, you can note this in this action type. The timestamp of the rental and a description are recorded. In addition, documents can be attached.
Inspection or service visit by an external technician or vendor for device-related tasks, often in combination with a device repair.
If a device has been visited, this can be recorded with this action. The timestamp of the visit and a description are recorded. In addition, documents can be attached.
Adjustment of device settings to modify specific operational parameters.
You can record the changes of parameter values, so that they are listed in the "Parameters" tab. You can add some description too.
Installation of new or improved software to enhance device functionality or security.
A software update action includes the specification of the time, the software type, the specification of the version as well as information on the person responsible and information on repositories, links and other documents that can be attached.
The purchase of a device can be documented here.
The delivery of a device can be documented here.
Mount information are listed in this tab, but it is not possible to add new mounts on the device page.
To add a mount, go to configurations, select the one you want to create the mount for and open the Platforms And Devices tab. There it is possible to add new mounts.
To edit an existing device, first click on the view button of the selected device and then on the edit button of the window that now opens. Now you can make changes similar to the instructions under create new device. Changes to the Basic Data page must then be saved using the Apply button.
With a click on this button in the three-dot-menu next to the edit button, you open a dialog that allows showing the SensorML of the device in a new tab, or to download the file to your local computer.

SensorML is an OGC standard, that allows data exchange & usability of the sensor information with other applications.
In the Sensor Management System it is possible to both archive or delete devices. In general archiving is the preferred way, as it allows to restore the entry later. Deletion should only happen if the device contains completely nonsense data. Otherwise it is better to add some note to the description and to archive.
Only group administrators are allowed to archive devices. Deletion is only allowed if the device is private, or if the user has the super user role within the Sensor Management System.
To archive an existing device, click on the dots at the end of the entry in the search list and then on archive.
 You'll be asked to confirm by clicking ARCHIVE.
Please note that it is not possible to delete/archive devices that are mounted in an existing configuration.
It is possible to copy existing devices. These can then be used as a template for a new device, for example. To do this, click on the three dots at the end of the entry in the result list and then on Copy

A new window will open and you will be asked which entries you want to take over into a new device. You can select the corresponding fields in checkboxes and then click green COPY Button on the top right corner. Or click CANCEL to come back to device list.
Most of the existing devices data are transferred in the form to create the new device. Elements that will not be copied are: serial number, inventory number, persistent identifier (as those will be different for every single device) and the existing device actions (the new device has its own history that is not related to the existing one).